A must-read for beginners: A beginner’s guide to Hummingbird Feeder

If this is your first time trying to attract hummingbirds to your garden, then a beginner-friendly hummingbird feeder is an essential starter. Hummingbirds are small and lively; their graceful movements and buzzing wings will instantly bring life to your garden. But don’t worry, beginners can easily get started. Just choose the right feeder, learn the honey water recipe, and pay attention to cleanliness and placement.
it andIn this article, I will combine the most practical beginner advice to tell you how to choose and use it, and also share some tips to get hummingbirds to visit your garden faster.
Table of Contents
Why the Hummingbird Feeder is worth buying
Hummingbirds are small birds with extremely high energy levels, requiring frequent feeding. Urbanization has reduced their natural food sources, so hummingbird feeders not only provide them with energy but also give us the opportunity to observe them up close.
For beginners, choosing the right feeder is crucial. A good feeder reduces cleaning hassles, prevents nectar from spoiling, and attracts more hummingbirds. Simply put, it’s your “garden magic,” making it easy for you to become a good owner of hummingbirds.
Key points for choosing a hummingbird feeder
Hummingbird feeder types: shallow dish vs. hanging bottle
- Shallow dish feeders contain nectar in a shallow dish, allowing hummingbirds to eat directly from above; inverted bottle feeders use a hanging bottle, feeding the bird through an opening at the bottom or side.
- For beginners, shallow trays are more user-friendly: they are easy to clean, less prone to leaks, and allow you to easily see the honey water level.
- While bottle feeders are a classic, the numerous interfaces and the hassle of disassembly can deter beginners.
Tip: If you’re looking for something simple, start with a shallow dish. Once you’re more familiar with it, you can try more complex designs later.
Capacity selection: Start with smaller capacity.
At the beginning, you don’t need a large feeder. If the feeder is too large, the honey water will spoil quickly if the baby doesn’t finish it, and bacteria and mold will easily grow.
- 500 ml.Beginners are advised to choose a small volume of around 300 ml to 500ml.
- This allows you to easily observe the hummingbird’s feeding frequency and also makes regular cleaning convenient.
Materials and Structures: Glass vs. Plastic
- and isGlass: It doesn’t easily absorb odors, is durable, and easy to clean. The downside is that it’s fragile, but it has a superior feel.
- Plastic: lightweight and inexpensive, but easily scratched and may discolor after prolonged exposure to sunlight.
- Metal + Glass/Plastic: More durable, but the complex structure increases the difficulty of cleaning.
Personal experience: Glass feeders are more reassuring, especially in the summer when high temperatures can easily cause honey water to spoil, and glass has better heat retention.
Color and protective design
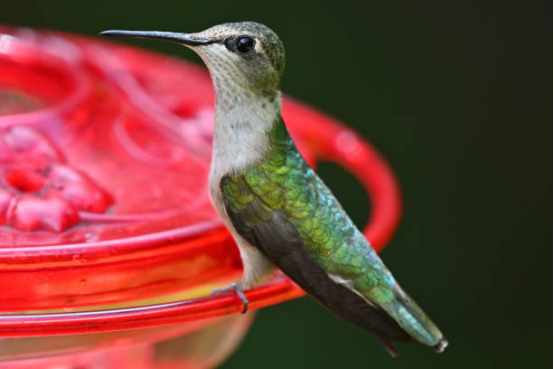
ant-Hummingbirds are particularly fond of red, so many feeders feature red feeding nozzles or flower-shaped decorations. Additional ant and wasp-proof designs also make them ideal for beginners, saving them a lot of trouble.
Ease of cleaning
Regardless of which hummingbird feeder you choose, ease of cleaning is essential. Simple disassembly and a wide enough opening are necessary for thorough cleaning and to prevent mold or bacteria growth. Since you need to change the honey water almost daily in the summer, ease of cleaning is crucial.
Tips for using Hummingbird Feeder
Choosing the right feeder is only the first step; the method of use is even more crucial:
- Place it
in a semi-shaded, well-ventilated area, avoiding direct sunlight. Honey water spoils easily under strong sunlight. - For height and safety
, it is recommended to hang it 1.2–1.8 meters off the ground, away from windows or glass doors, to prevent hummingbird strikes. - The safest and most recommended ratio
for honey water, it is 4 parts water to 1 part white sugar.
Do not use honey or red dye, as these may harm hummingbirds. - Change
the honey water every 2-3 days in summer and at least once a week in winter.
When cleaning, you can use warm water with a little vinegar, which is both disinfecting and safe. - To prevent fighting,
hummingbirds are territorial, and males may monopolize feeders.
If fighting is observed, prepare multiple hummingbird feeders, maintaining a distance of 3–5 meters between them.
Hummingbird Feeder for Beginners—Recommended for Beginners
The following feeders are perfect for first-timers:
- Small capacity shallow tray: easy to observe and easy to clean.
- Glass bottle type: durable and beautiful, with a moderate capacity.
- Mini and portable: Suitable for use on balconies and small courtyards.
Tip: Don’t hang too many hummingbird feeders at once. Beginners can start with 1-2, observe the frequency of hummingbird visits, and then gradually increase the number.
summary
In general, beginners should remember a few key points when choosing a hummingbird feeder:
Choose a hummingbird feeder with a moderate capacity, simple structure, and easy cleaning.
The honey-to-water ratio is correct (4:1 white sugar water), and it should be changed regularly.
Hang it in a safe, semi-shaded location, and avoid fighting.
By following these principles, your garden will soon be filled with fluttering hummingbirds, allowing you to experience the joy of birdwatching. Trust me, once the hummingbirds appear, you won’t be able to help but smile every time you see them buzzing and flapping their wings.